Event Tickets Addon Buy Now
Other Documentations
How to set up Event Tickets
September 27, 2023
Step 1:
Install and activate WooCommerce and follow their instructions to set up woocommerce store.
Step 2:
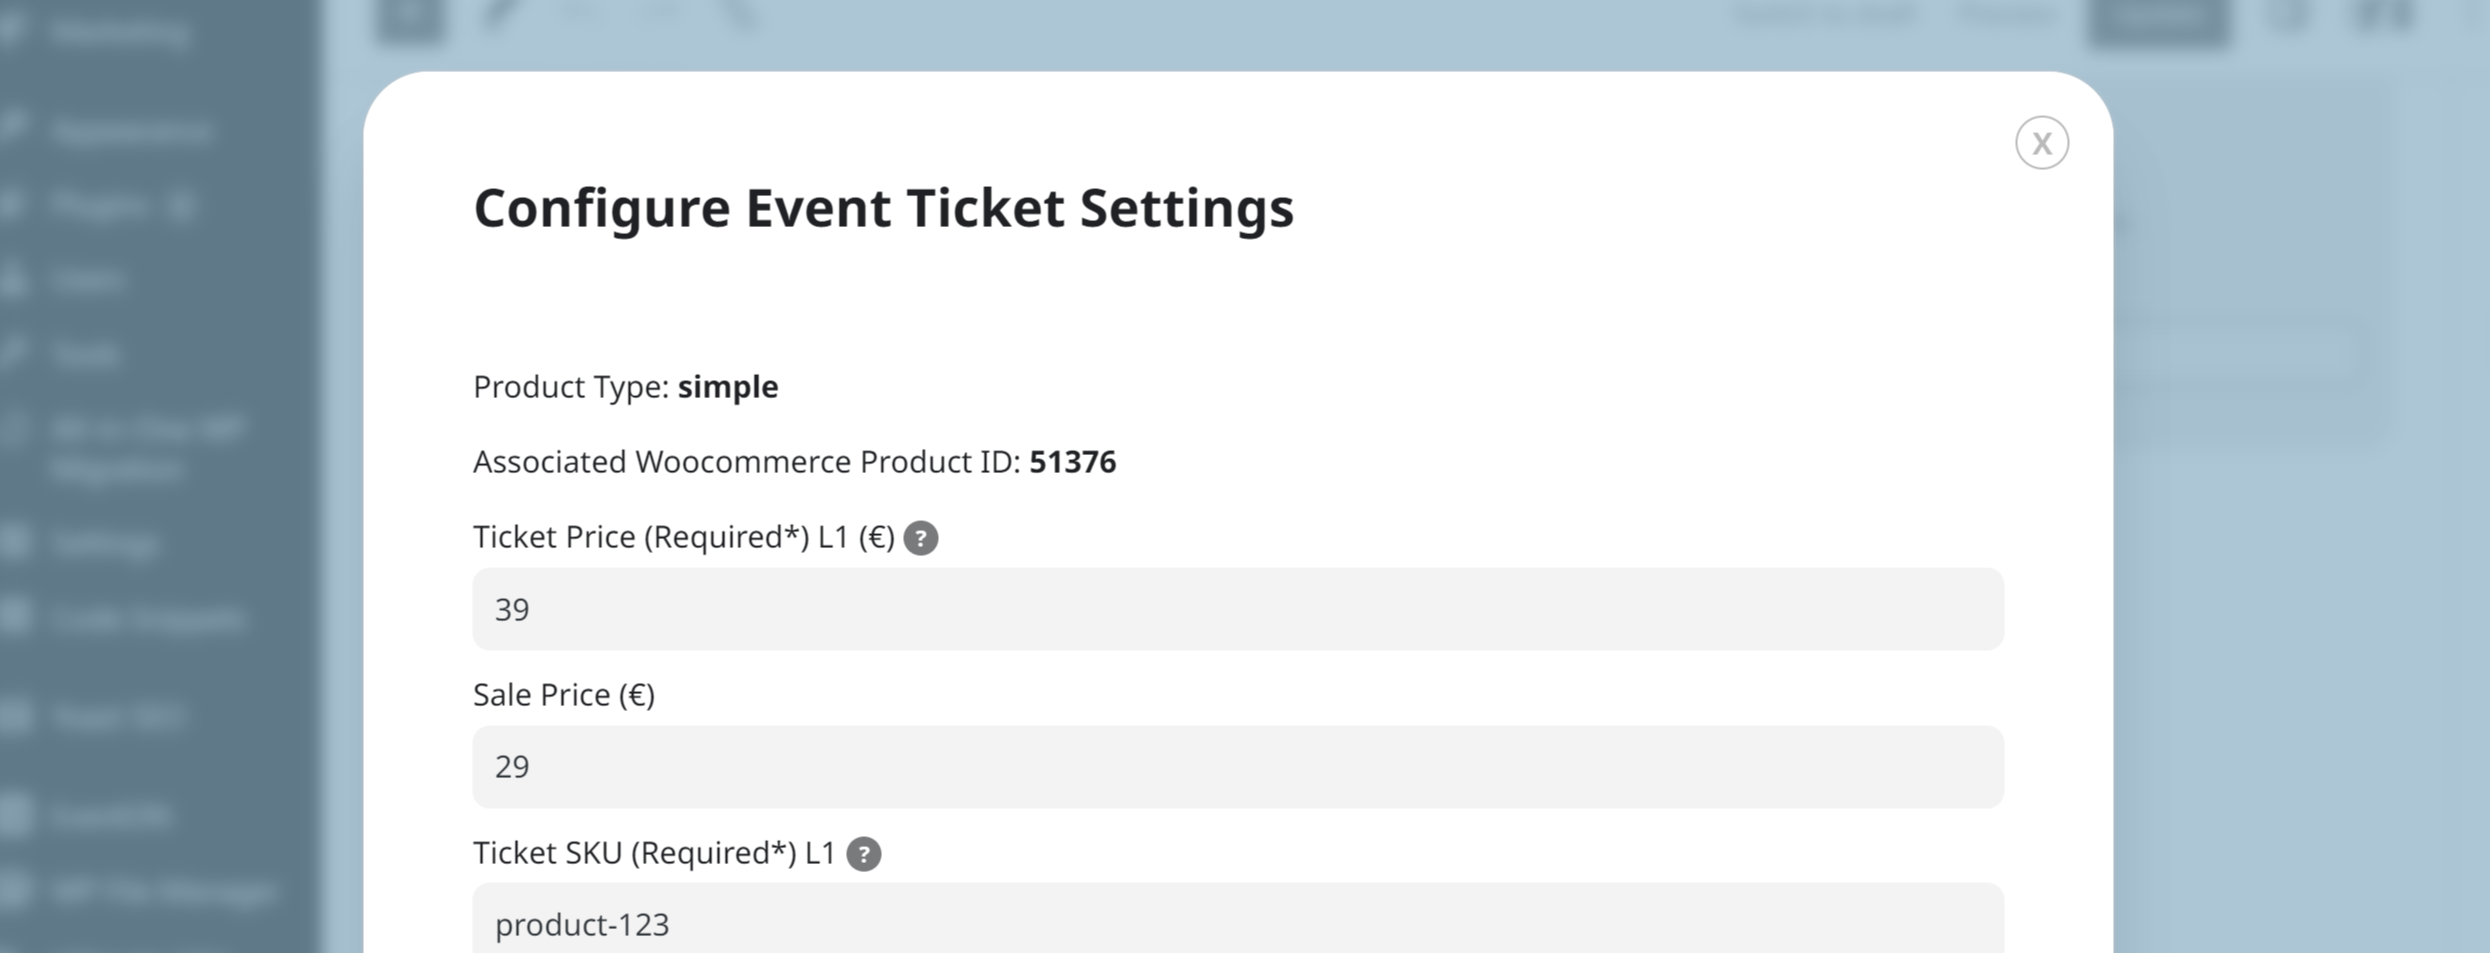
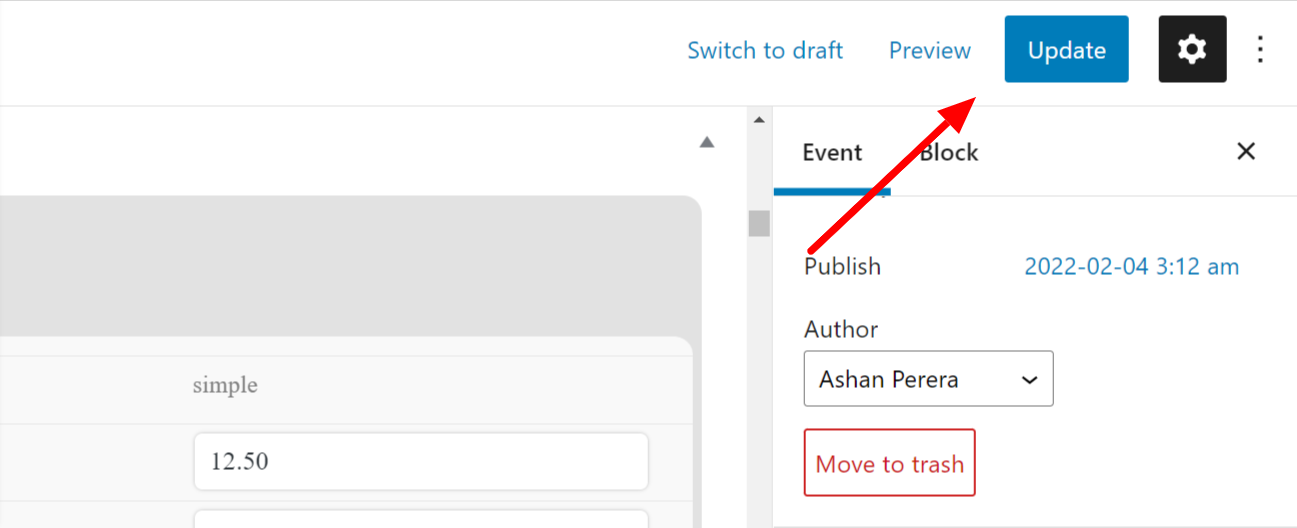
Create a new Event from Events > Add New Event or edit an existing event. In here you will see Event Tickets settings box like this.

Step 3:
Activate event ticket for this event and fill in information about the ticket.
Ticket price should be a decimal number such as 19.50 it should not be an integer (eg 19) that will give empty cart error.
SKU for the ticket is also important and required. If this was not filled the order may not go through as this is how woocommerce identifies a product to be a unique product in your inventory. In reality you should not have same SKU for 2 different items. SKU stands for stock keeping unit.
Capacity is not required but you can set capacity to limit number of tickets sold.
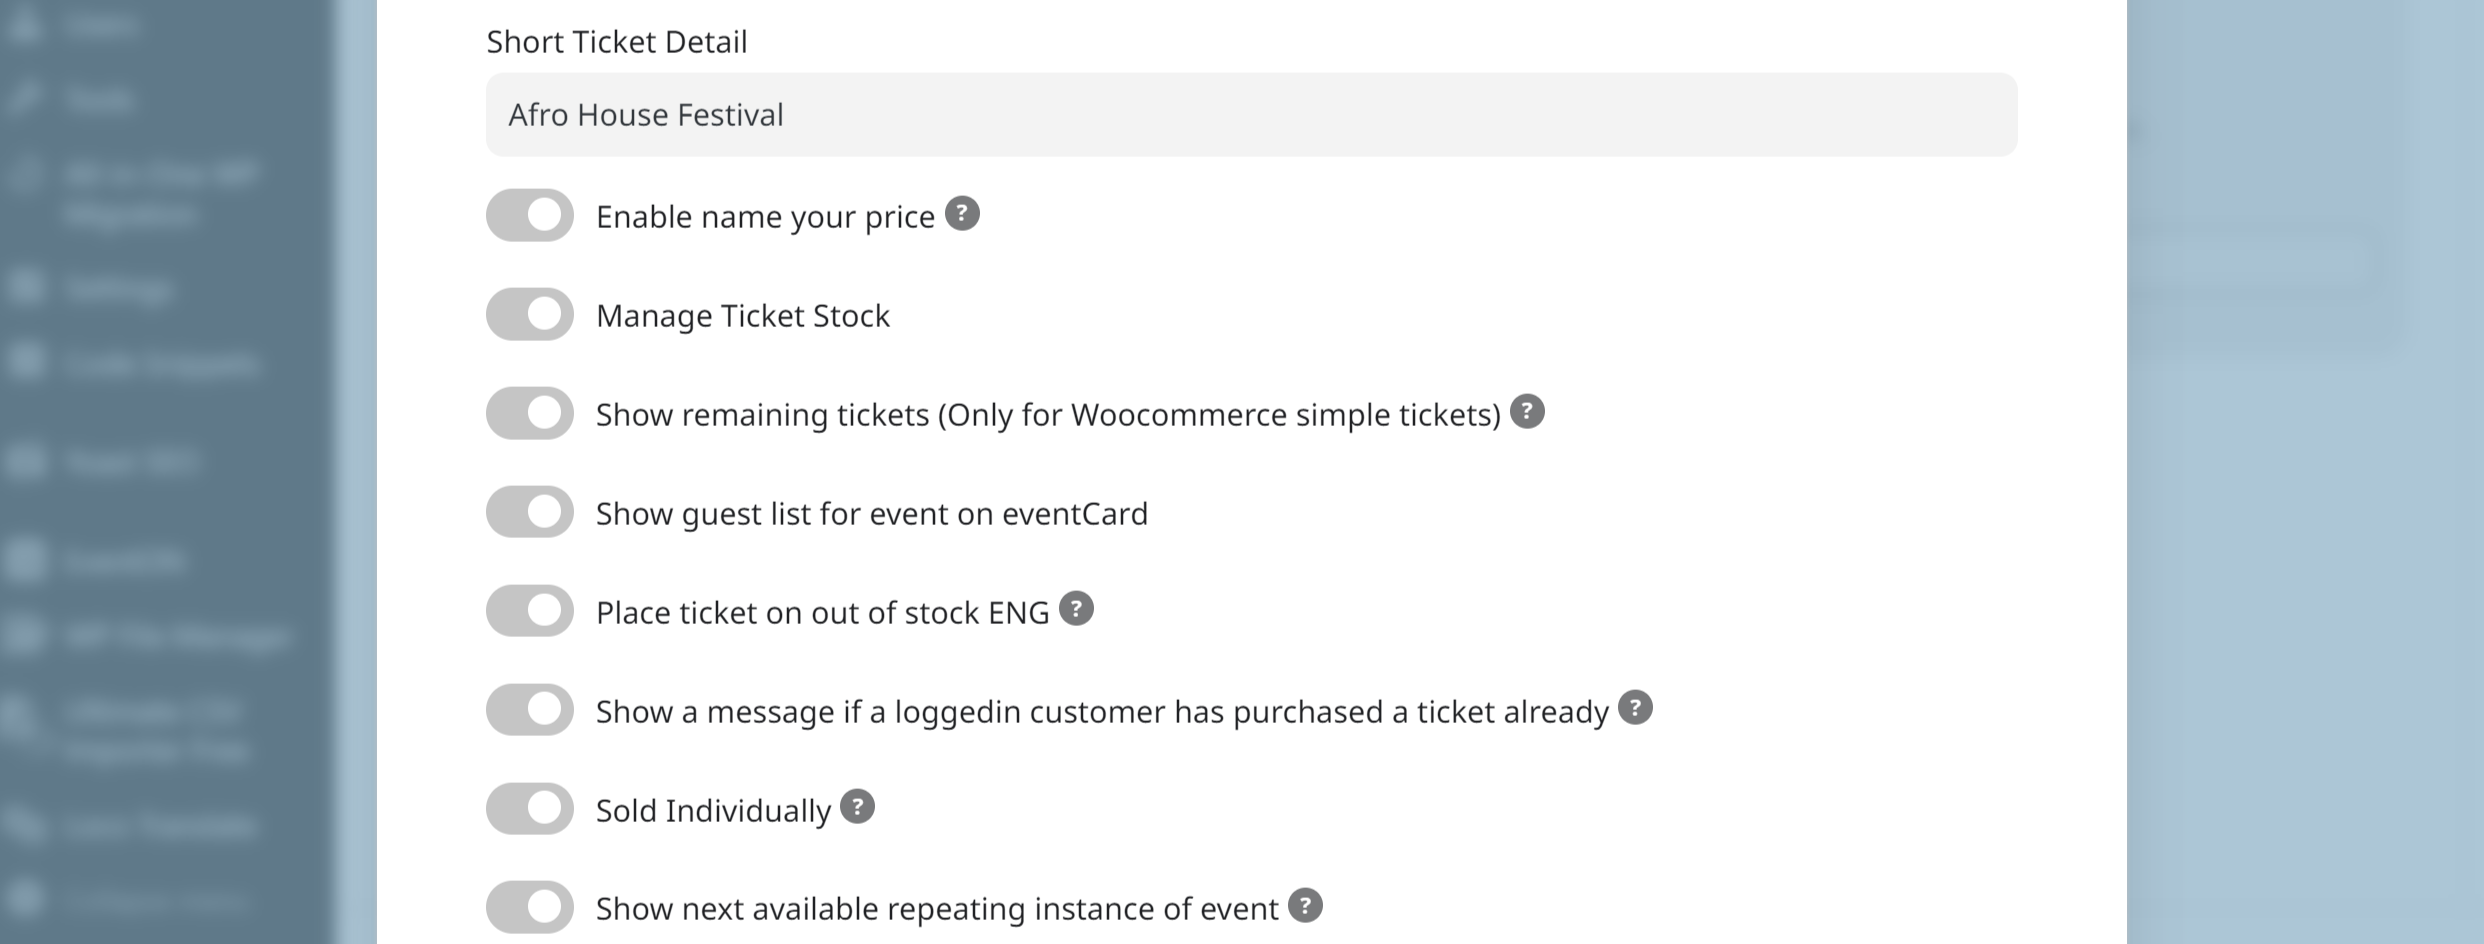
Make ticket out of stock will mark ticket as sold out and no one will be able to buy tickets. It is important to know once the event has past current day the ticket will automatically become unavailable for purchase.
Sold Individually will allow customers to only buy one ticket at a time.
Step 4:
Click update event or Publish (if you just created a new event) This will create associate WooCommerce product (ticket) for this ticket you activated.
Step 5:
Go to EventON > Settings> EventCard and find the Event Ticket Box and re-arrange as you wish and click Save Changes
The Event tickets should appear on front-end. You can also further customize the ticket to create variable priced tickets.
Further Improvements & Additions
We have seen customers having trouble with ticket orders not completing after purchase in WooCommerce. We suggest Woocommerce Order Status Control plugin to help resolve auto complete orders issue.
Did this article help you? If not, send us a ticket via helpdesk