How to Install and use the Virtual Plus addon
Last Updated: February 21, 2025
The Virtual Plus addon is a super-charged solution to cover all the needs of your virtual event access system. The addon comes packed with real-time virtual event updates for your site visitors, Jitsi Moderator Control, the ability to customize the kind of scheduled information that is displayed before and after your virtual events, and many other features that we’ll discuss below.-
Compatibility
This addon integrates seamlessly with Event Tickets, Action User, RSVP, Event Countdown, and Reviewer addons.
Installation
Before getting started, be sure to install and update the EventOn plugin by downloading it from your Codecanyon account. You can follow our tutorial on how to install & activate Eventon.
Next, you’ll need to install and activate Virtual Plus addon by following our general guide about how to install EventOn addons.
Restricting access to virtual events using the RSVP addon
You can easily change the settings of your virtual event and limit access to RSVP’d guests. Here’s how to do it:
1. Create a new event or edit an existing virtual event and enable the “Allow visitors to RSVP to this event” option.
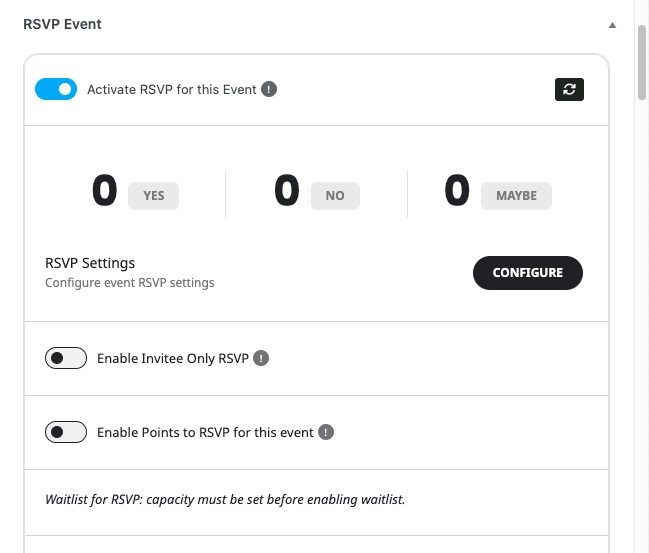
2. Within this section, configure your RSVP settings that will dictate how users will interact with the RSVP form on the front end. You can enable or disable one of these settings:
- Total Event RSVP capacity
- Show RSVP count for the event on EventCard
- Show guest list to event (on eventCard)
- Show guest list ONLY after RSVP-ing to event
- Show list of guests who are NOT coming to the event (on eventCard)
- Limit maximum capacity count per each RSVP
- Allow only logged-in users to RSVP to this event
- Activate event happening minimum capacity
- Show RSVP form within EventCard instead of lightbox
- Close RSVP before event start (in minutes)
- Show only certain additional fields in RSVP form (separated by commas)
Real-time Heartbeat Refresh
This feature allows real-time background refresh of all the data that is displayed in your event using heartbeat script. The information displayed includes remaining spaces and guests lists when RSVP events are enabled, pre-event and after-event information.
To enable this feature, click on EventON > Settings > Virtual Plus.
You can also configure the refresh rate of the above information from this section by selecting the time difference in seconds in the dropdown field as shown below:
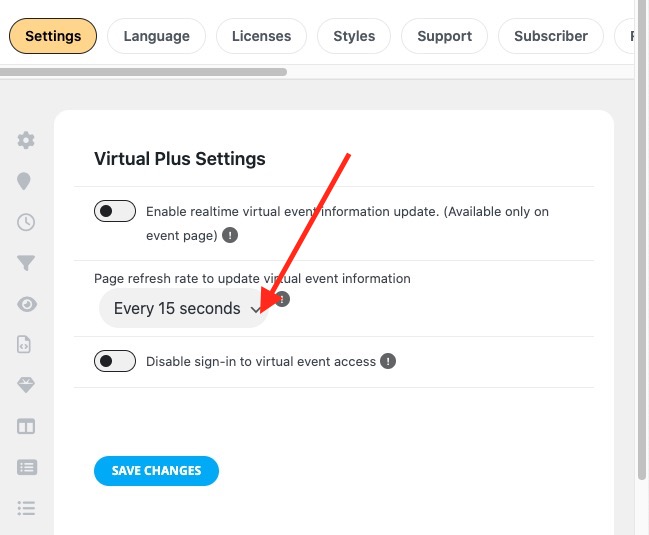
You can toggle the last option on this page to prevent users from being forced to sign in to view event information. This feature applies to logged-in users that have RSVP or have an Event tickets account.
Jitsi Moderator Control
Our Jitsi integration allows you to assign a registered user in your site as the event moderator. You can do this by selecting a user from the following option on the Virtual Event section:
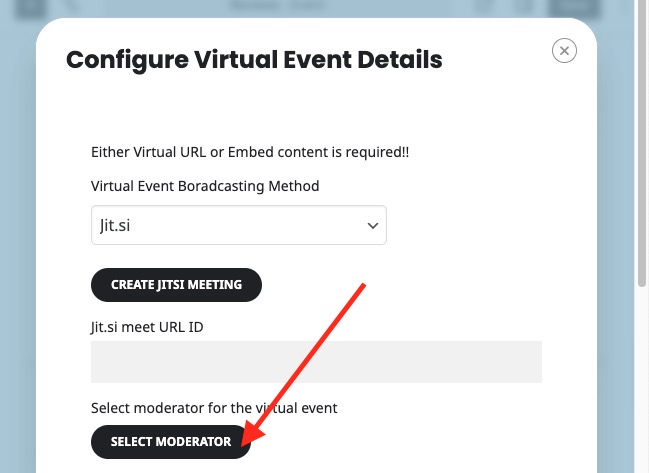
Next, enable this option:
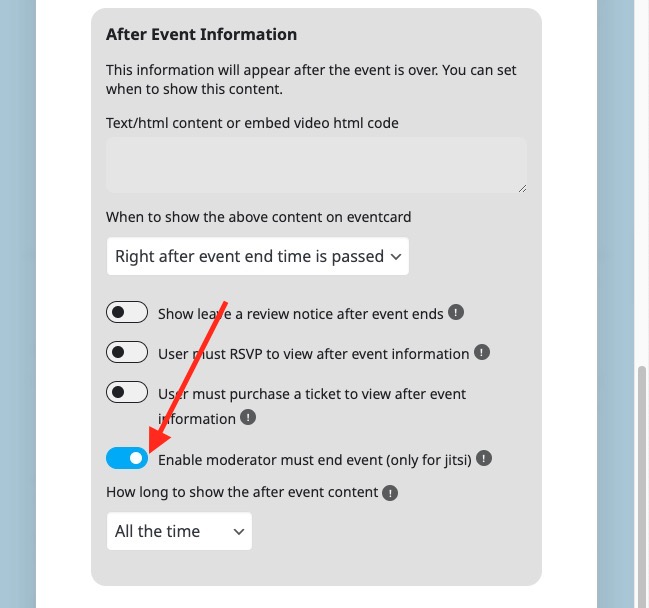
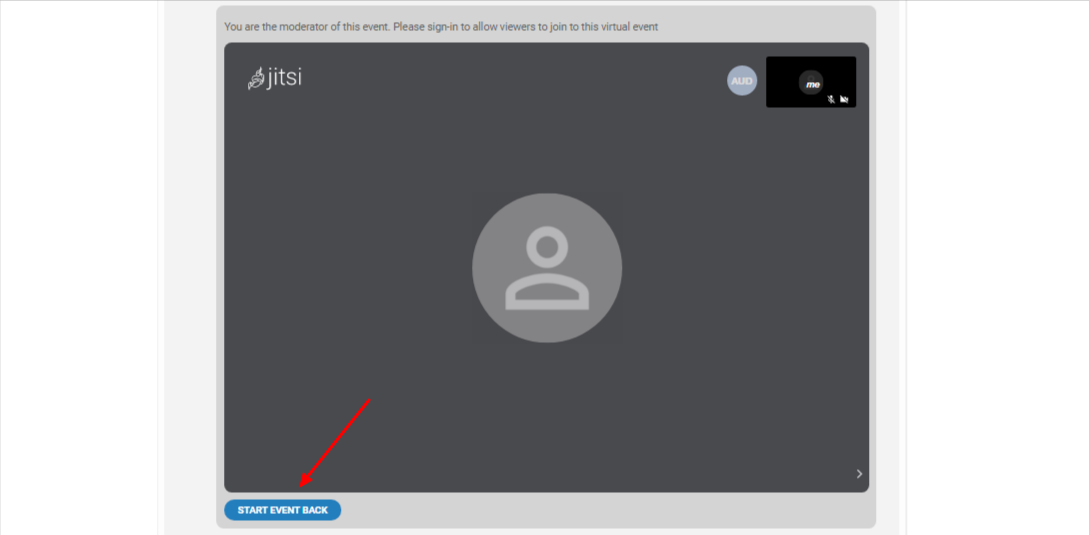
Once these options are enabled, the integration will display a Blue button at the bottom of the Jitsi window to start and end the event:
Pre-Event Information
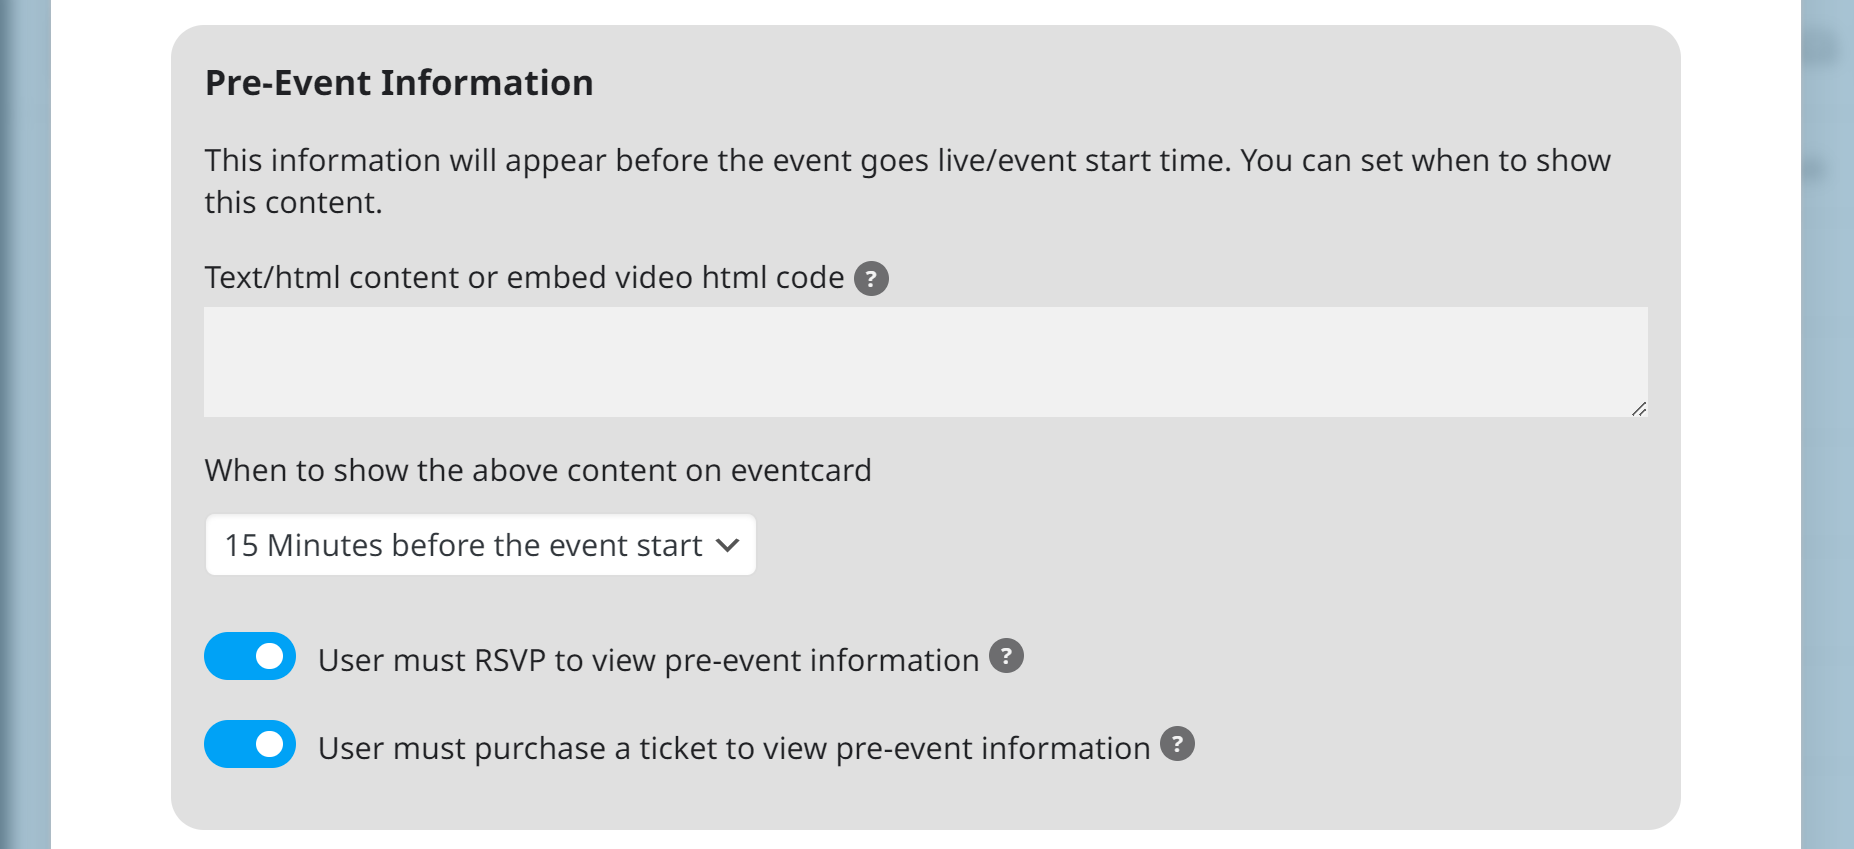
This feature will display some custom information for your guests before the event starts. You can use this option to display the meeting agenda or tutorials that can help guests to prepare for the meeting. This field accepts both text, HTML, and embedded content. The details will appear above the event card as shown below:

You get to control who will view & when this information will be displayed from the event settings as shown below:
After Event Content
To display some post-event content, navigate to the After Event Information section on the edit event page as shown below:
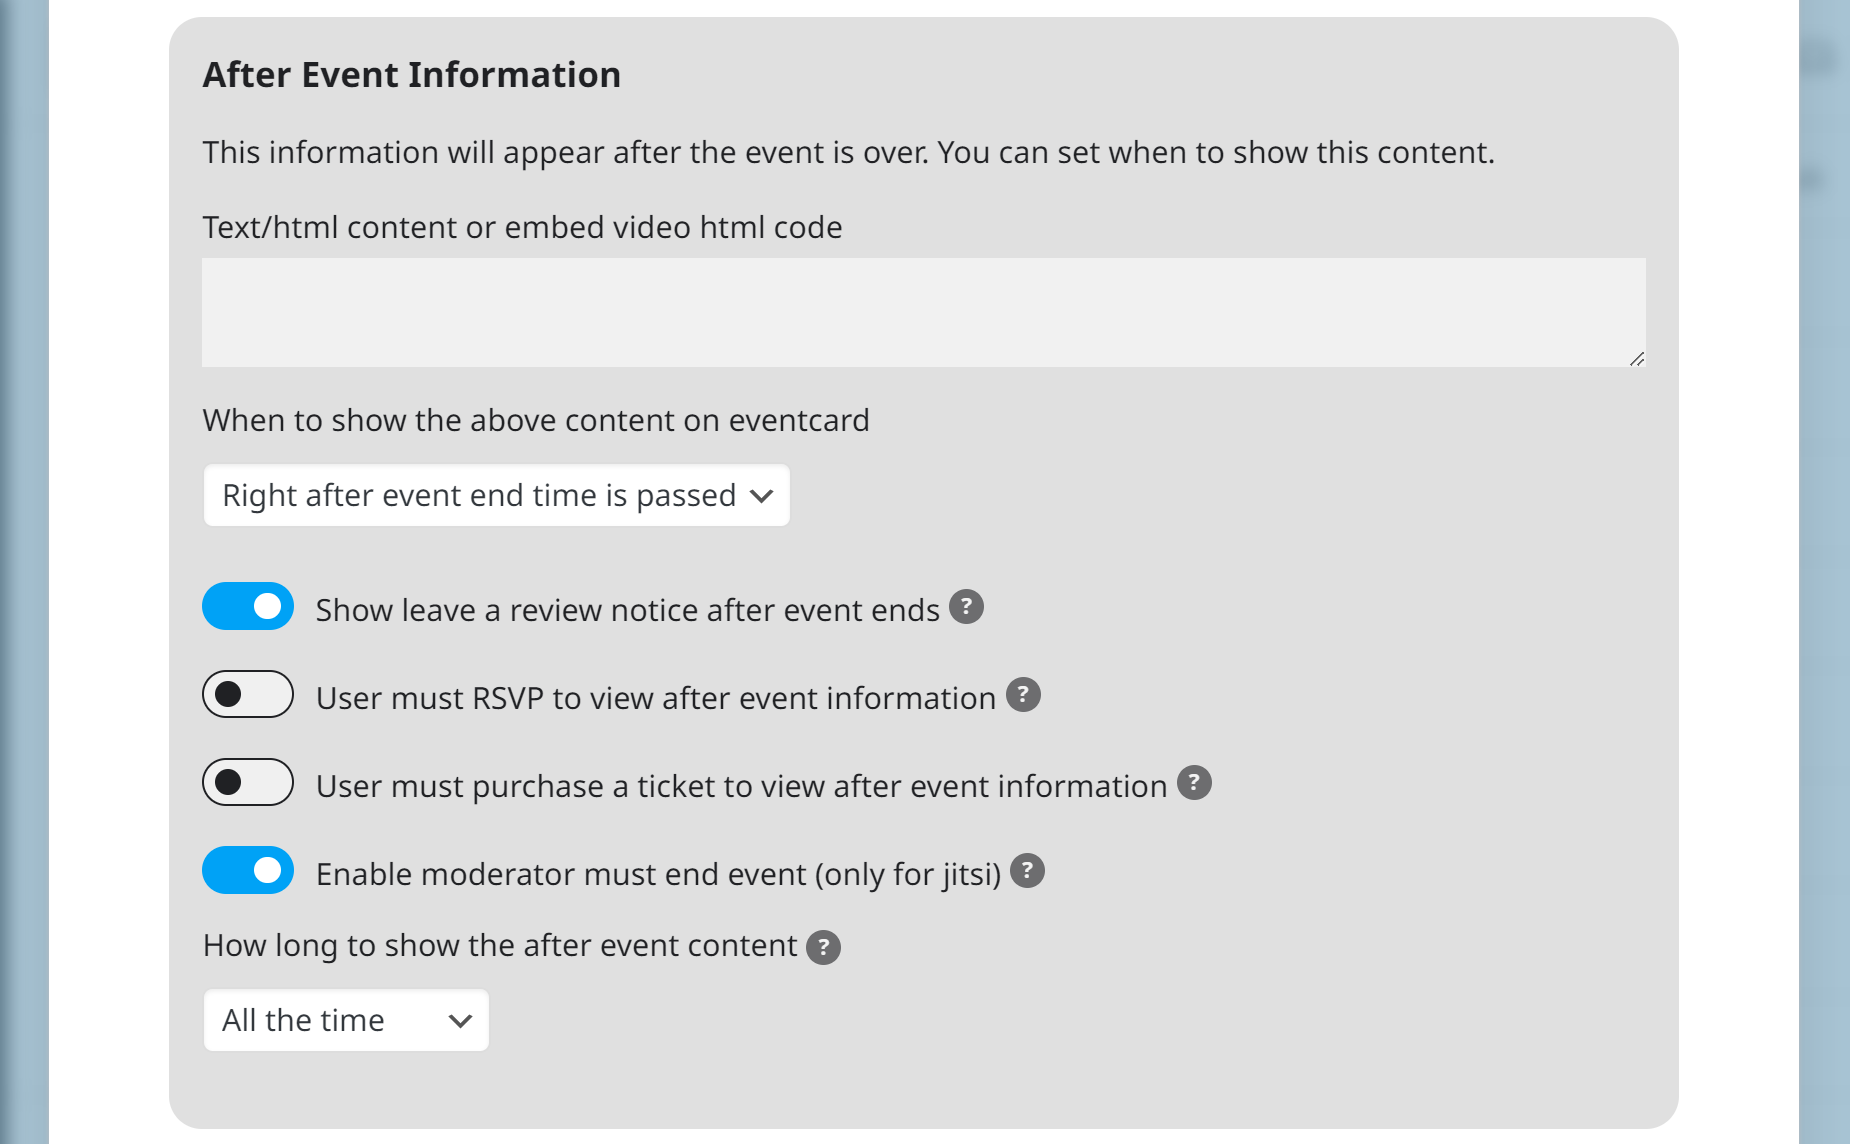
In this section, you can force a user to RSVP or purchase an event ticket before viewing the post-event information.
You can also prompt the guest to leave a review if you already have the Reviewer addon as shown below:

Did this article help you?