How to Install and use the DailyView addon
Last Updated: February 21, 2025
Would you like your users to interact and view your daily list of upcoming events in a nicely formatted layout? The DailyView addon would be a great fit for you! With this addon, your site visitor will be able to click through each day of the month to check the events that are scheduled on each date.
Compatibility
If you’d like to get more features from the DailyView addon, we recommend installing the Action User and the Full Call addons. These addons will make it possible to allow front-end event submissions, user permissions control and a the ability to create traditional grids.
Installation
Before getting started, be sure to install and update the EventOn plugin by downloading it from your Codecanyon account. You can follow our tutorial on how to install & activate Eventon.
Next, you’ll need to install and activate DailyView by following our general guide on how to install EventOn addons.
User guide
There are various ways to display this calendar on your site. We are going to cover each one below:
Method 1:
To get started, head over to WP Dashboard > Posts > Add new and create a new post.
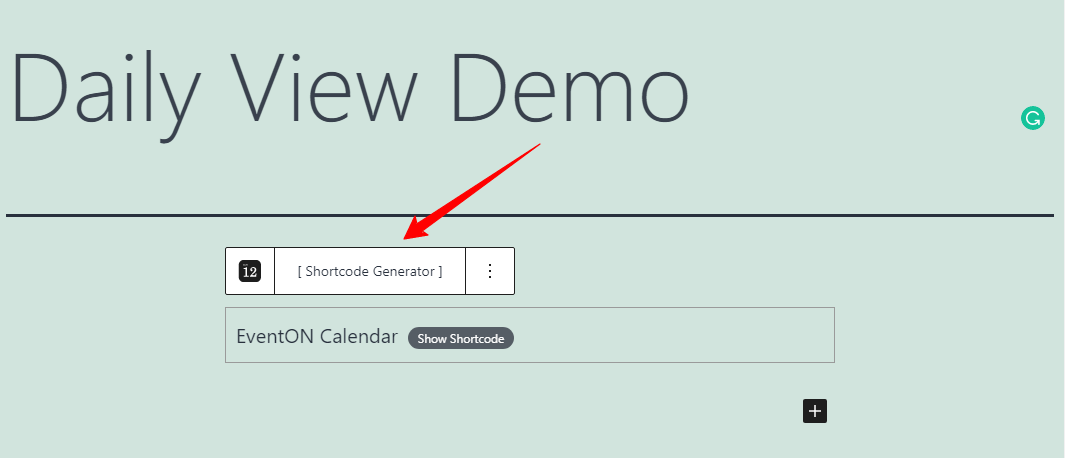
Enter the post title and then type /eventON on the editor to quickly select the EventOn block. Alternatively, click on the Add block button and search for eventON as shown below:

Click to select the block and then click on the [Shortcode Generator] button as shown below:
Select DailyView option to customize the available variables on your shortcode as shown below:
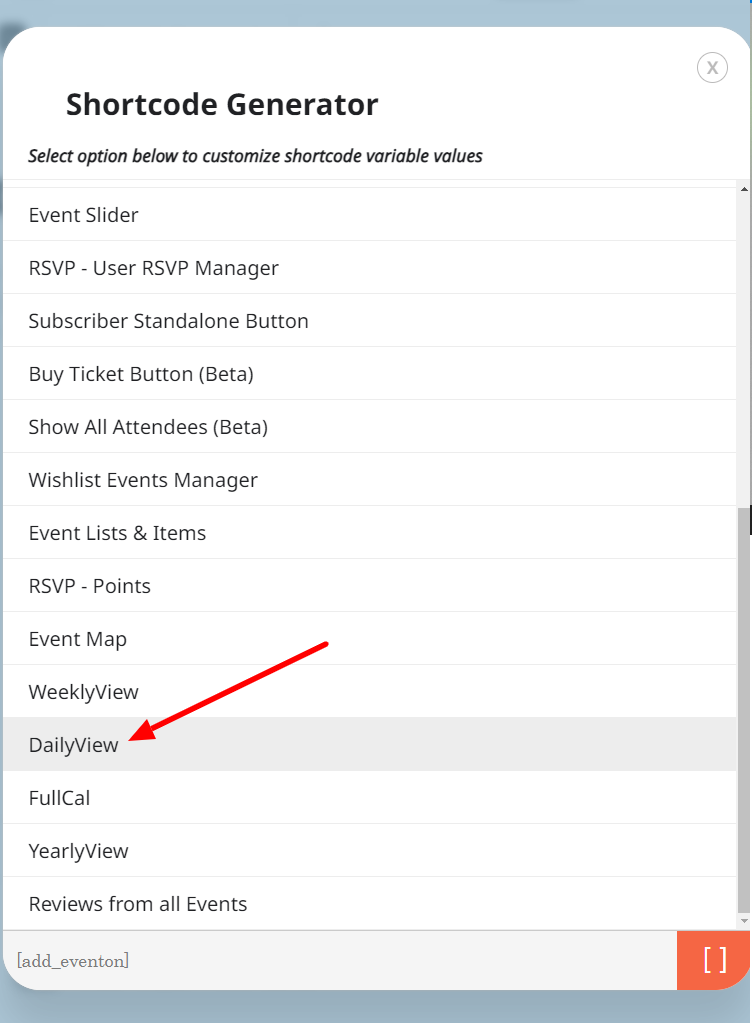
Within the shortcode generator page, you can customize the following options:
1. Calendar ID: Enter a unique ID that you can use to identify this calendar. This is optional
2. View Style: Select the kind of view that will be displayed on your calendar on the front end. There are two options available: With month strip and Just one day. The first screenshot shows “With month strip” and the next one “Just one day” option.
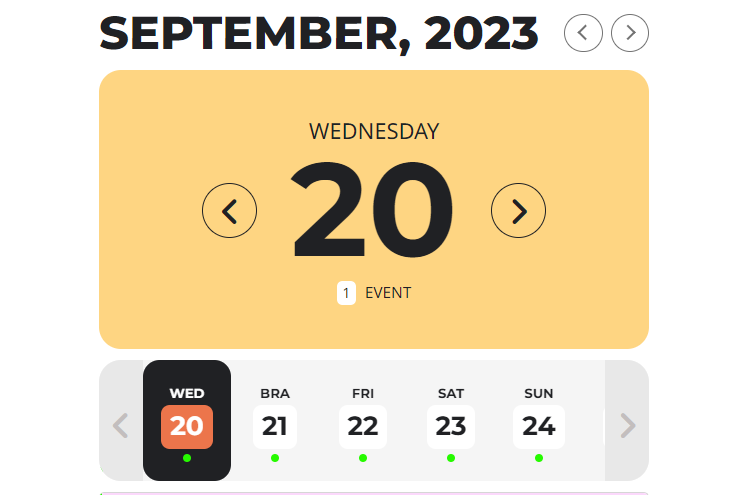
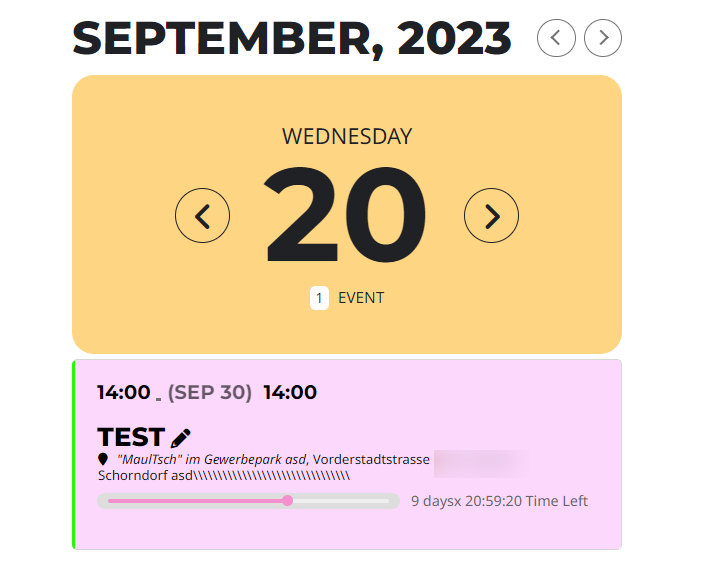
3. Show featured image: Enable or disable the option to show featured images when listing events.
4. Feature event priority: Enable the display of feature events at the top of the list.
5. Day Increment: Modify the starting day of the calendar from the current day. For example, setting this to +3 will display the calendar days 3 days in the future.
6. Month Increment: Modify the initial month that will be displayed on the calendar. For example, setting this to +2 will display the calendar from March if the current month is January.
7. Event Type ENG: Select the category ID from the dropdown field if you’d like a filtered list of events from specific categories on this taxonomy.
8. Event Type 2: Select the category ID from the dropdown field if you’d like a filtered list of events from specific categories on this taxonomy.
9. Fixed Day: Set a fixed day of the year when you’d like the calendar to begin from. (Both fixed month and fixed year should be set for this variable to work correctly)
10. Fixed Month: Set a fixed month when you would like the calendar date to begin listing events.
11. Fixed Year: Set a fixed year when you’d like the calendar date to begin listing events.
12. Event type color override: This option will override the event color with the event type colors that have been configured on the category. The option will only take effect if you have event type colors configured.
13. Open eventCards on load: This option will override the settings for the default calendar and display event cards when the calendar loads on the page.
14. Event Order: Select the order in which events will be displayed, by default events will be listed in ascending order but you can toggle this option to display them in descending order.
15. Language Variation: Select the language variation that you would like displayed by default. You can configure different text translations by heading over to myEventON > Settings > Language.
16. Show jump months option: Display an option to show the month jumper that makes it possible for the front end user to skip to a specific month and view events.
17. Switch to first of month: When this option is enabled, the focus will default to the first day of the month when you select a different month.
18. Hide Focus Date Section: This option will hide the focus date option in the daily view calendar.
Method 2:
You can also create a DailyView calendar by directly accessing the built-in shortcode generator tool. This option is available from WP Dashboard > myEventON > Settings > Shortcodes as shown below:
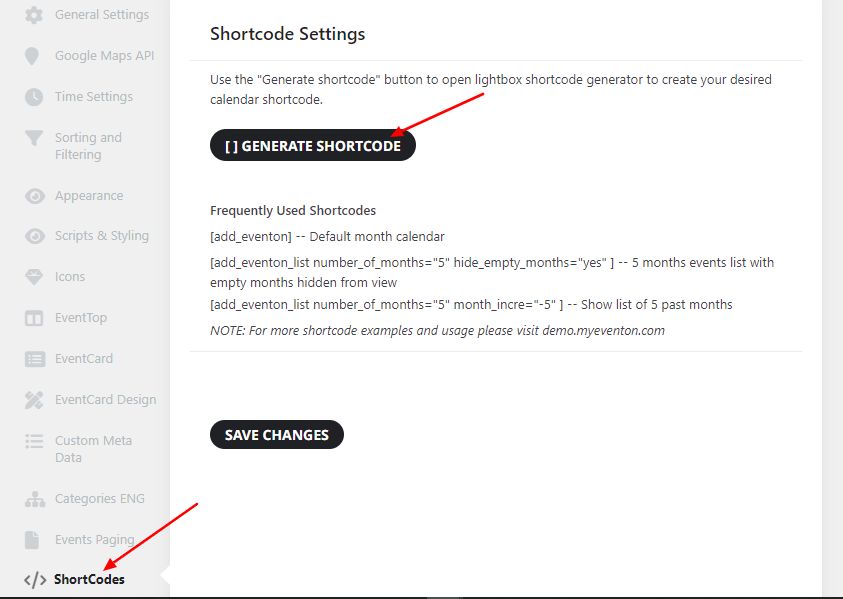
Once your shortcode is ready, you can copy it and paste it within your post, page, or sidebar widget.
Appearance Settings
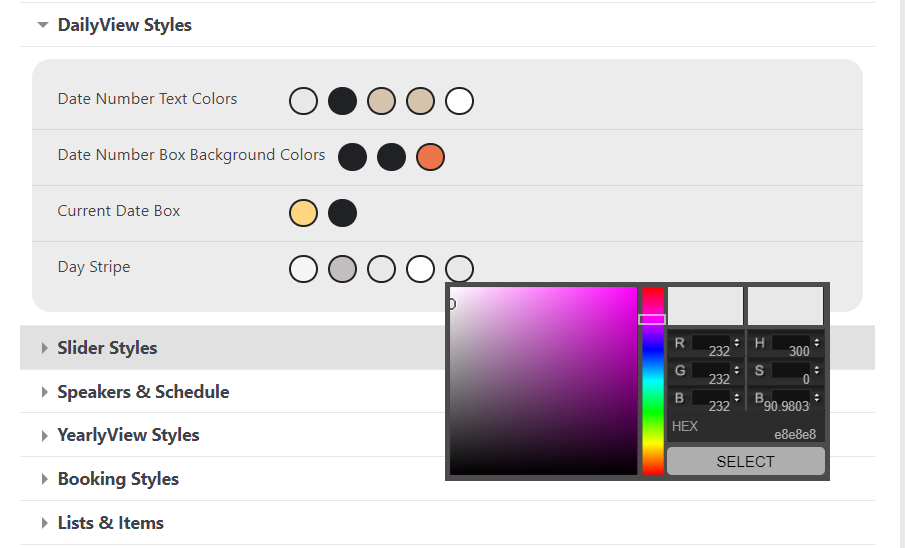
You can customize the font colors, hover, background, focus colors that will be applied to your DailyView calendar by heading over to WP Dashboard > myEventON > Settings > Appearance > DailyView Styles as shown below:
Did this article help you?