How to Use the EventCard Designer
Last Updated: August 31, 2023
In EventON, the term “EventCard” refers to the front-end container that displays all the event details. To provide a seamless customization experience for this section, we introduced the EventCard designer in version 4.0 and we can’t wait for you to give it a try!
The EventCard designer represents an interactive graphical drag-and-drop builder that makes it snappy to design the perfect layout for your event cards. Please go to EventON > Settings > EventCard Design to access the designer.
The designer supports both single-column and multiple-column layouts to organize the event data. Here is a list of the supported row layouts:
Single-column layout

Two-column layout

Three-column layout

Two-column left double-stacked

Two-column right double-stacked

Two-column left triple-stacked

Two-column right triple-stacked

Supported Actions
The designer allows you to perform the following actions:
Deletion of fields from the event card

Deletion of the entire row of field data

Hiding fields temporarily

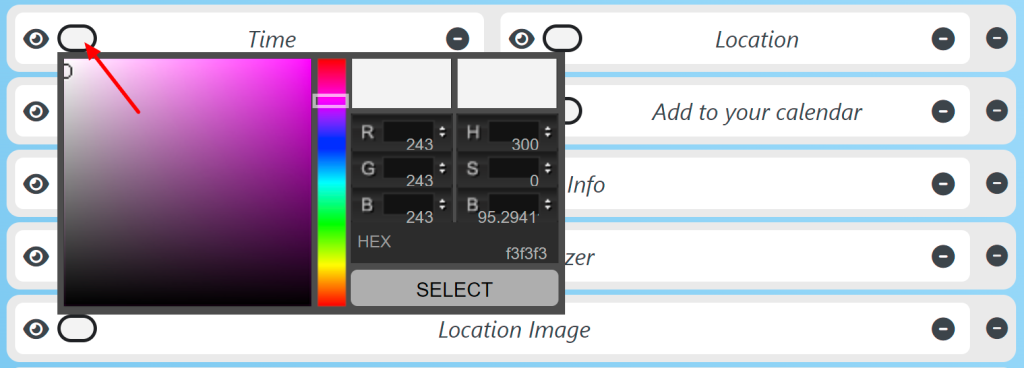
Changing the background color of the field

Reorder rows using drag-and-drop

Adding a Field to the EventCard
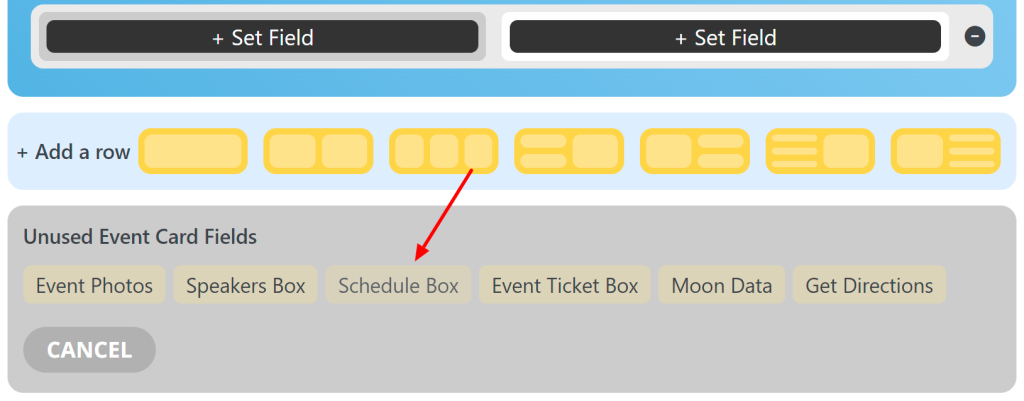
To get started, please ensure that you have some unused fields at the bottom of the designer as shown below:

If you don’t have any fields yet, you can delete the fields you want to remove or replace from the designer interface using the abovementioned steps. Once this is done, move to the next step below.
Select and click on one of the available column layouts.

For the purpose of this tutorial, I selected the two-column layout and as soon as this is done, two field options will appear in the designer as shown below:

Click on the + Set Field button and select one of the unused event card fields:

Clicking on one of the fields will replace the empty field as shown below:

Repeat this process for all the empty fields.
Once all the changes have been made hit the Save Changes button!
Did this article help you?
- How to
- ** How to use event_type category to do more
- How to Activate EventON
- How To Allow Users to Submit Events and Create an Events Listing Page
- How to apply a patch fix
- How to Bulk Update Language Translations Using the Import/Export Tool
- How to cancel addon subscription before auto renew
- How to Deactivate EventON Addon Licenses
- How To Display or Hide the Live Now Icon
- How to Enable Auto-updates for EventON
- How to find your EventON license key
- How to Fix a Broken Sidebar Caused by the EventON Widget
- How To Hide Blank Rows On the Calendar EventTop
- How To Set Up and Use the Filter Bar on Calendars
- How to Set Up Health Guidelines for EventON and Extend It
- How to Setup & Use Custom Fields for Events
- How to setup & use multi data types
- How to Setup Basic Paypal for Events
- How to show past events
- How to show your calendar on external sites using an iFrame
- How To Turn on Sort Options On Your Calendar
- How To Upgrade Your EventON Addon License
- How to Use Hashtags to Link to Event Sections
- How to Use Single Event Data Values
- How to Use the EventCard Designer
- How To Use the EventON Shortcode Executor(ESE) Widget
- How To Use The EventTop Designer
- How To Use the ICS Import Tool
- How to Use Virtual Visible Event End Time for Events with Limited Visibility but Extended Durations
- Using an SMTP Mail Plugin To Solve Email Delivery Issues in EventON