- Get Started
- User Guide
- How to
- ** How to use event_type category to do more
- How to Activate EventON
- How To Allow Users to Submit Events and Create an Events Listing Page
- How to apply a patch fix
- How to Bulk Update Language Translations Using the Import/Export Tool
- How to cancel addon subscription before auto renew
- How to Deactivate EventON Addon Licenses
- How To Display or Hide the Live Now Icon
- How to Enable Auto-updates for EventON
- How to find your EventON license key
- How to Fix a Broken Sidebar Caused by the EventON Widget
- How To Hide Blank Rows On the Calendar EventTop
- How To Set Up and Use the Filter Bar on Calendars
- How to Set Up Health Guidelines for EventON and Extend It
- How to Setup & Use Custom Fields for Events
- How to setup & use multi data types
- How to Setup Basic Paypal for Events
- How to show past events
- How to show your calendar on external sites using an iFrame
- How To Turn on Sort Options On Your Calendar
- How To Upgrade Your EventON Addon License
- How to Use Hashtags to Link to Event Sections
- How to Use Single Event Data Values
- How to Use the EventCard Designer
- How To Use the EventON Shortcode Executor(ESE) Widget
- How To Use The EventTop Designer
- How To Use the ICS Import Tool
- How to Use Virtual Visible Event End Time for Events with Limited Visibility but Extended Durations
- Using an SMTP Mail Plugin To Solve Email Delivery Issues in EventON
- General
- Basic System Requirements for EventON
- Best Practices Before Doing an Addon Update
- How to Delete Old Events from WordPress Trash Automatically
- How To Upgrade From Lite to Full Version
- I am confused about Event Type categories
- What is the calendar filter
- Why am I unable to proceed with the checkout for addon purchases?
- Troubleshooting
- ** What to check if eventON is not working
- How to debug for PHP code errors
- How to debug Javascript interactive issues
- How to find if an issue is coming from eventON
- How to fix font awesome icons not working on your site
- How to fix style override issues
- Increasing the WordPress Memory Limit
- Troubleshooting Using the Health Check Plugin
- Why is Location Google Map grayed out or not displayed on Event Card
- Virtual Events
- Frequently Asked Questions
- Code snippets
- CODE: To add additional healthcare guidelines
- How to add new social share icons
- How to change “events” slug & rewrites
- How to customize the eventtop date format
- How to hook into eventTop
- How to increase event type category count
- How to load EventON scripts to a page
- How to show additional custom data in the eventCard
- CODEX
- Event Post Meta Variables
- Hooks: Actions & Filters
- How to Add a Custom Event Status
- How to Customizing the Upcoming Events List on Event Taxonomy Archive Pages
- How to enable Plugin Editor for WordPress
- How to get more custom event data fields
- How to Include Additional Languages
- How to use Actions and Filters
- Taxonomies of EventON
- Template Tag: add_eventon
- Other
- Tricks and Tips
- ** Override CSS in your calendar
- How to create events that goes past midnight
- How to customize Events archive page
- How to customize location and organizer archive page
- How to override event colors with event type colors
- How to show featured image on eventTop
- How to show various information on the eventTop
- How to translate EventON with WPML on the front-end
- One solution for /events slug not working
- Various Creative Ways to Use Multi Data Types
- APIs
- Addons
- Action User
- ActionUser Paid Feature Events
- ActionUser Plus
- Advent Calendar
- Bookings
- Check-ins
- Countdown
- CSV Importer
- DailyView
- Dynamic Pricing
- Event API
- Event Dynamic Pricing
- Event Lists
- Event Map
- Event Photos
- Event Reviewer
- Event Search
- Event Seats
- Event Slider
- Event Tickets
- Auto Complete Ticket Order
- Auto re-stocking refunded, cancelled or failed orders
- Changelog for Event Tickets
- CODE: How to send Emails as Bcc
- How to add additional data to confirmation email
- How to add additional fields at checkout
- How to add additional fields to download attendees CSV file
- How to customize ticket email template
- How to manage capacity separately for repeat events
- How to set up Event Tickets
- How to set up variable prices for Tickets
- How To Switch From WooCommerce Blocks to Shortcode-Based Cart & Checkout Pages
- Event Wishlist
- EventBrite
- Filters Plus
- FullCal
- ICS Importer
- Include Anything
- Lists & Items
- Moon Data
- PDFer
- Polls
- QR Code
- Reminders
- Repeat Customizer
- RSS Feed
- RSVP Events
- RSVP Events Invitees
- RSVP Events Waitlist
- RSVP Points
- Single Events
- Speakers & Schedule
- Subscriber
- Sync Events
- Tickets Waitlist
- Variations & Options
- Virtual Plus
- Weather
- WeeklyView
- YearlyView
- Policies
- Server Related
- Shortcode
- Translation & Languages
How to Update EventON
Last Updated: August 14, 2026
NOTE: Before any update, we highly recommend backing up your WordPress installation.
1.0 Method #1: Via auto-update
In order to get auto updates, you must activate your EventON copy in your website.
How to get new auto updates for eventON.
Go to Dashboard > Updates and click Check Again to run plugin update checker.
Go to Plugins> Installed Plugins if there is a new eventON update you should see it under the EventON plugin row.
Click Update Now to perform auto update.
2.0 Method #2: Manual Download from myeventon.com
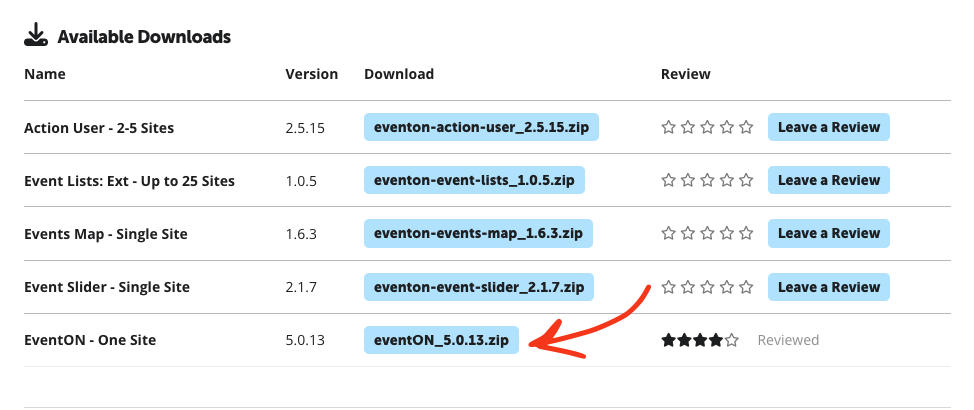
Go to myeventon.com and sign into your account. Then head over to My Account. From left side menu select Downloads. From available downloads, click the .zip file under download column.
2.1 – FTP Way
Go into your FTP Client and navigate to ../wp-content/plugins/ folder in your website
Delete all the files inside EventON folder and replace with new files from the latest zip file you downloaded
Go to wp-admin Plugins> Installed Plugins and make sure the new version is updated on the site.
NOTE: You will NOT lose any saved settings by updating this way. As for styles and appearances, after updating via FTP go to myeventon settings and click save changes without making any changes to re-save styles and appearances. However we strongly advice, backing up database (in phpMyAdmin) and backing up and translation files inside /lang folder.
2.2 – Back-end Way
In order to install new EventON version from backend please follow these steps.
IMPORTANT! Before doing this: We highly recommend you backup phpmyadmin database and your website files in wp-content folder.
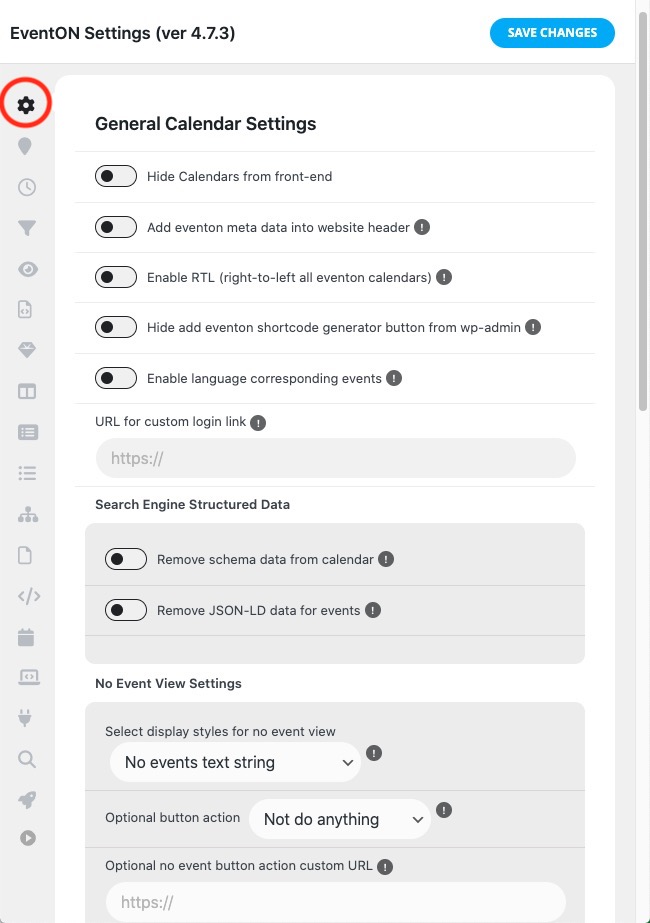
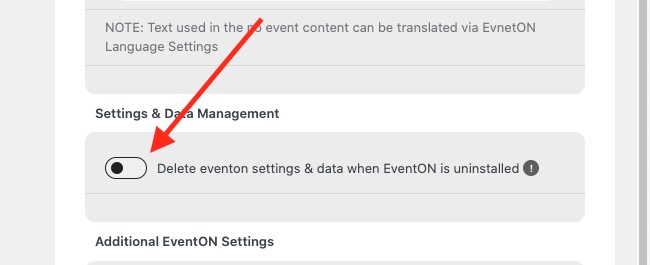
First, go into EventON settings and make sure “Delete eventon settings & data when EventON is uninstalled” is Deselected and then Save Changes.
WARNING! – When updating from EventON version 2.6.6 & 2.6.7 you must leave the above settings to NO (due to code error)! – If you are on EventON v2.6.8 or up (until 4+) this setting must be set to YES in order to keep already created events. From 4.0 you need to set this option to YES only if you want to delete EventON Settings and Events.
Next go to Plugins > Installed Plugins and Deactivate EventON. If you have EventON addons you will see EventON missing notifications popping up. At this moment, you can ignore these notifications.
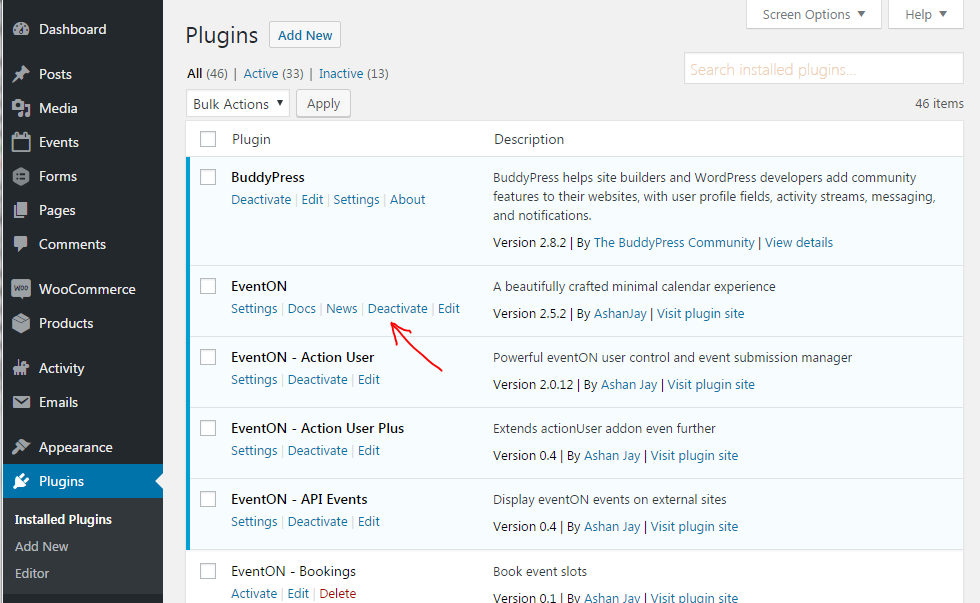
Next Delete EventON from your site.
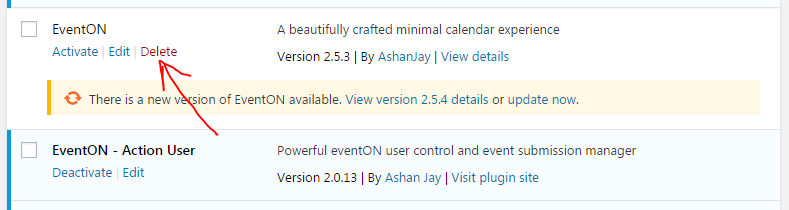
Once EventON is deleted, go to Plugins > Add New > Upload Plugin and upload the downloaded EventON version zip file
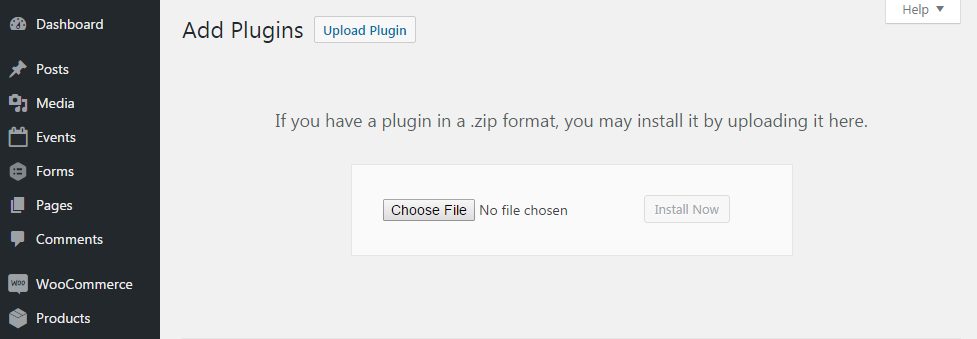
Once uploaded, go back to Plugins > Installed Plugins and activate EventON.
Did this article help you?