- Get Started
- User Guide
- How to
- ** How to use event_type category to do more
- How to Activate EventON
- How To Allow Users to Submit Events and Create an Events Listing Page
- How to apply a patch fix
- How to Bulk Update Language Translations Using the Import/Export Tool
- How to cancel addon subscription before auto renew
- How to Deactivate EventON Addon Licenses
- How To Display or Hide the Live Now Icon
- How to Enable Auto-updates for EventON
- How to find your EventON license key
- How to Fix a Broken Sidebar Caused by the EventON Widget
- How To Hide Blank Rows On the Calendar EventTop
- How To Set Up and Use the Filter Bar on Calendars
- How to Set Up Health Guidelines for EventON and Extend It
- How to Setup & Use Custom Fields for Events
- How to setup & use multi data types
- How to Setup Basic Paypal for Events
- How to show past events
- How to show your calendar on external sites using an iFrame
- How To Turn on Sort Options On Your Calendar
- How To Upgrade Your EventON Addon License
- How to Use Hashtags to Link to Event Sections
- How to Use Single Event Data Values
- How to Use the EventCard Designer
- How To Use the EventON Shortcode Executor(ESE) Widget
- How To Use The EventTop Designer
- How To Use the ICS Import Tool
- How to Use Virtual Visible Event End Time for Events with Limited Visibility but Extended Durations
- Using an SMTP Mail Plugin To Solve Email Delivery Issues in EventON
- General
- Basic System Requirements for EventON
- Best Practices Before Doing an Addon Update
- How to Delete Old Events from WordPress Trash Automatically
- How To Upgrade From Lite to Full Version
- I am confused about Event Type categories
- What is the calendar filter
- Why am I unable to proceed with the checkout for addon purchases?
- Troubleshooting
- ** What to check if eventON is not working
- How to debug for PHP code errors
- How to debug Javascript interactive issues
- How to find if an issue is coming from eventON
- How to fix font awesome icons not working on your site
- How to fix style override issues
- Increasing the WordPress Memory Limit
- Troubleshooting Using the Health Check Plugin
- Why is Location Google Map grayed out or not displayed on Event Card
- Virtual Events
- Frequently Asked Questions
- Code snippets
- CODE: To add additional healthcare guidelines
- How to add new social share icons
- How to change “events” slug & rewrites
- How to customize the eventtop date format
- How to hook into eventTop
- How to increase event type category count
- How to load EventON scripts to a page
- How to show additional custom data in the eventCard
- CODEX
- Event Post Meta Variables
- Hooks: Actions & Filters
- How to Add a Custom Event Status
- How to Customizing the Upcoming Events List on Event Taxonomy Archive Pages
- How to enable Plugin Editor for WordPress
- How to get more custom event data fields
- How to Include Additional Languages
- How to use Actions and Filters
- Taxonomies of EventON
- Template Tag: add_eventon
- Other
- Tricks and Tips
- ** Override CSS in your calendar
- How to create events that goes past midnight
- How to customize Events archive page
- How to customize location and organizer archive page
- How to override event colors with event type colors
- How to show featured image on eventTop
- How to show various information on the eventTop
- How to translate EventON with WPML on the front-end
- One solution for /events slug not working
- Various Creative Ways to Use Multi Data Types
- APIs
- Addons
- Action User
- ActionUser Paid Feature Events
- ActionUser Plus
- Advent Calendar
- Bookings
- Check-ins
- Countdown
- CSV Importer
- DailyView
- Dynamic Pricing
- Event API
- Event Dynamic Pricing
- Event Lists
- Event Map
- Event Photos
- Event Reviewer
- Event Search
- Event Seats
- Event Slider
- Event Tickets
- Auto Complete Ticket Order
- Auto re-stocking refunded, cancelled or failed orders
- Changelog for Event Tickets
- CODE: How to send Emails as Bcc
- How to add additional data to confirmation email
- How to add additional fields at checkout
- How to add additional fields to download attendees CSV file
- How to customize ticket email template
- How to manage capacity separately for repeat events
- How to set up Event Tickets
- How to set up variable prices for Tickets
- How To Switch From WooCommerce Blocks to Shortcode-Based Cart & Checkout Pages
- Event Wishlist
- Filters Plus
- FullCal
- ICS Importer
- Include Anything
- Lists & Items
- Moon Data
- PDFer
- Polls
- QR Code
- Reminders
- Repeat Customizer
- RSS Feed
- RSVP Events
- RSVP Events Invitees
- RSVP Events Waitlist
- RSVP Points
- Single Events
- Speakers & Schedule
- Subscriber
- Sync Events
- Tickets Waitlist
- Variations & Options
- Virtual Plus
- Weather
- WeeklyView
- YearlyView
- Policies
- Server Related
- Shortcode
- Translation & Languages
How to Add and Publish Events
Last Updated: October 20, 2025
Welcome to EventON! After installation, adding events is straightforward using the familiar WordPress editor. This guide walks you through creating your first event, from basics like title and dates to optional customizations. Events power your calendar, so start here to populate your site.
Prerequisites:
- EventON installed and activated (see our Installation Guide).
- WordPress 5.0+ with Gutenberg editor.
- Basic WP knowledge (e.g., publishing posts).
Once set up, events appear via shortcodes like [add_eventon]. Learn more in our Shortcode Guide.
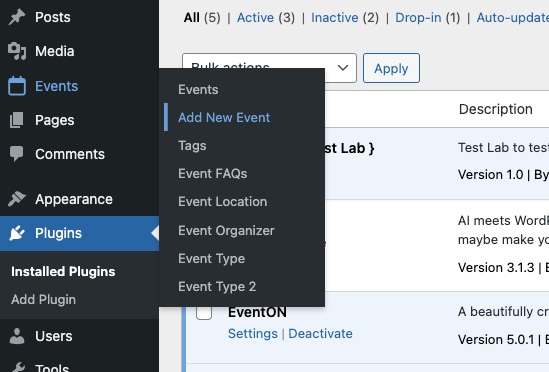
Step 1: Accessing the Add Event Screen
- In your WordPress dashboard, look for the Events menu item on the left sidebar (it appears after activation).
- Click Add Event (or hover on Events and select Add New).
This opens a new event post in the block editor, similar to adding a page or post.
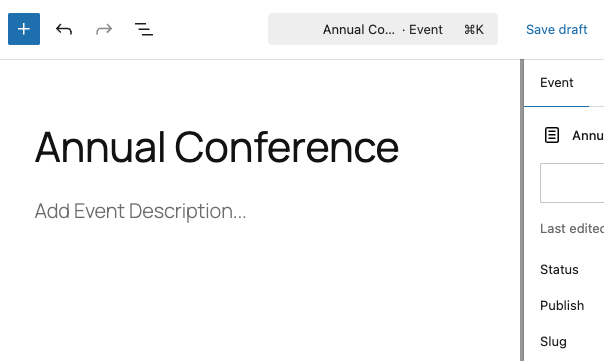
Step 2: Adding Title, Description, and Content
- Enter the Event Title (e.g., “Annual Conference 2025”).
- In the Gutenberg editor below, write the Event Description using blocks for text, headings, or media.
Enhance with Media and Files:
- Add images, videos, or galleries directly in the editor—they’ll appear in the event details on the calendar.
- Embed links to PDFs or downloadable files (e.g., agendas) using the Link block. These show under event details for easy access.
Step 3: Setting Event Dates & Times
- Scroll to the Main Event Details section (metabox).
- From Time & Date side menu item, set Start Date/Time and End Date/Time using the calendars.
- Note: Always select an end date— if omitted, EventON defaults to the start date, which may cause display issues for multi-day events.
- You can select your desired Event Timezone here.
- Under Event Time Extended Type you can select, if the event will be full day long, month long, or year long. — this will override the event date/time from above.
- For repeat events – Click Repeat Event and fill in repeat event data.
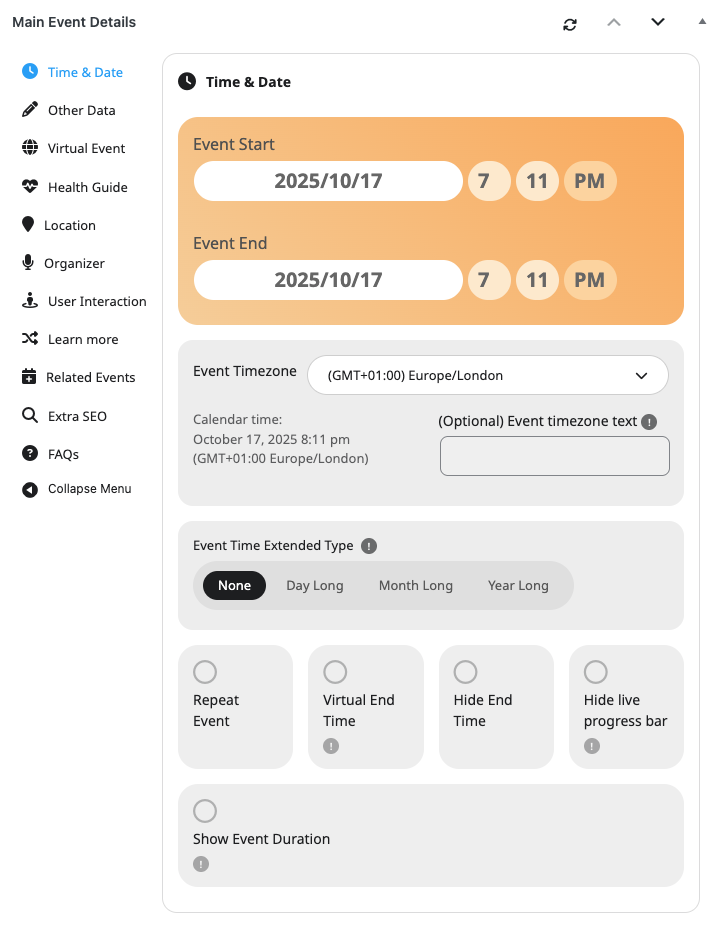
Other Event Date Time Options Explained.
| Event Option Type | Description |
| Virtual End Time | Set a virtual event end date/time, which is visible on the calendar. However the event end date/time will be used for displaying the event in calendar. |
| Hide End Time | Hide end event date/time on calendar — show only event start date/time. |
| Hide Live Progress Bar | Hide the live event progress bar from eventTop on the event. |
| Show Event Duration (@v5.0) | Display duration of the event on eventTop and on eventCard time box. |
Step 4: Setting Other Data
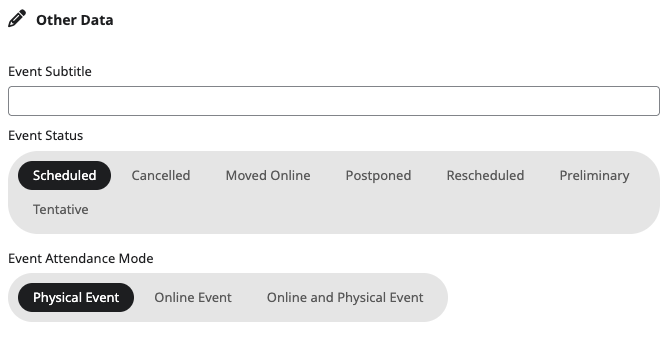
Other Data Explained.
| Option | Details |
| Event Subtitle | Set a subtitle for an event, which can be configured in eventON Settings > EventTop > EventTop Designer to appear on the eventTop. |
| Event Status | Specify current event status. – Scheduled, Cancelled, Moved Online, Postpones, Reschedules, Preliminary, or Tentative. Some options like Cancelled will allow you to add a reason/ further details. — Add this field to eventTop from EventTop Designer. |
| Event Attendance Mode | Set whether the event is, Physical Event, Online Event, or Online and Physical Event. Attendance mode will create a tag that will can be shown in eventTop (enabled via EventTop Designer). It will also populate SEO Schema data. |
Step 5: Creating or Choosing a Location
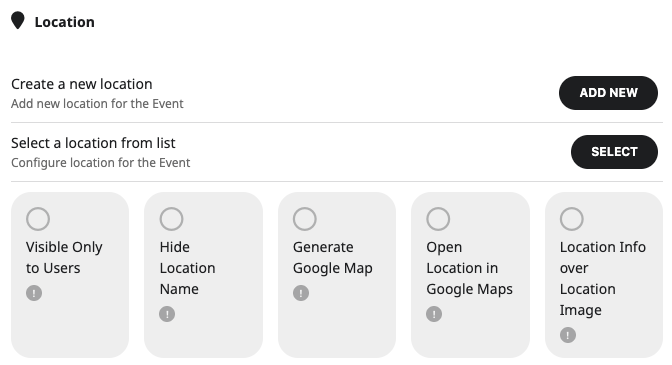
Location Options Explained.
| Option | Description |
| Visible Only to Users | Make event location only visible only to registered users of your website. |
| Hide Location Name | Hide location name from eventCard location box. |
| Generate Google Map | Generates a google map from the location address in eventCard. Must be added in EventCard Designer. |
| Location Info over Location Image | If you add a location image for the location, this will show location name and description over the location image. — Location Image must be added to EventCard via EventCard Designer. |
“Note: Google maps API must be set for the google map to appear in event.”
Adding a New Location
Create a new location and provide the necessary location information.
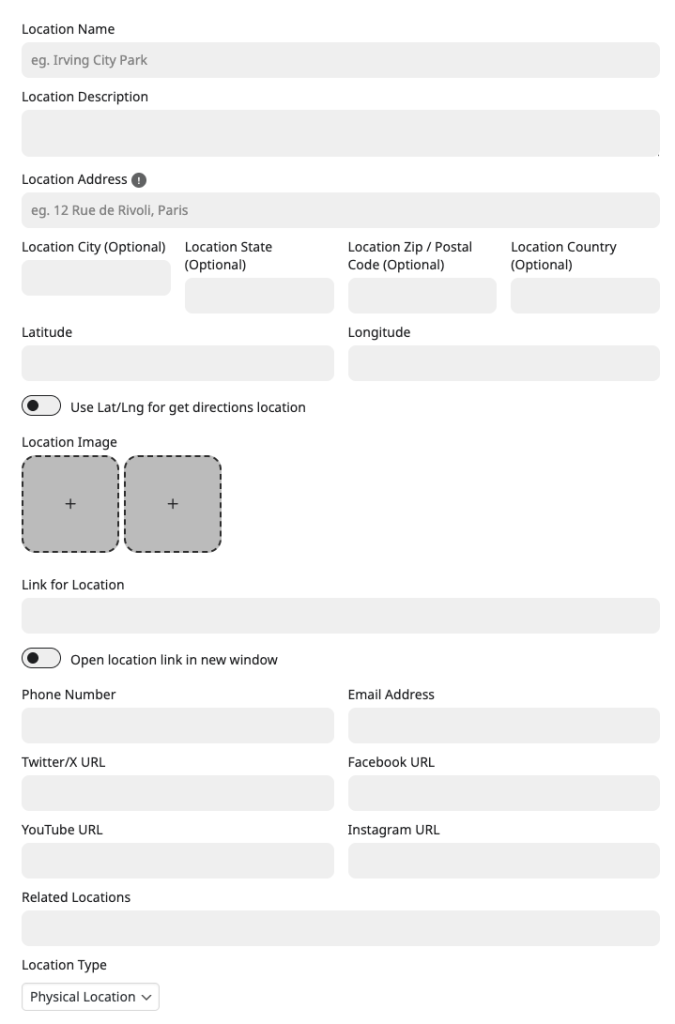
Adding New Location Options Explained.
| Option | Description |
| Latitude/ Longitude | Leave empty when creating a new location. It will be automatically populated once the location is saved. When editing a location, you will see a new button to populate location (Next to save changes). |
| Location Image | Set location images by clicking on the + box, which will open WP Media Library. |
| Link for Location | Add http:// url for the location you would like to be opened from location information sections. |
| Related Locations | If you have added other locations, you can select those in here that are related to this location. This will show on location archive page and location lightbox. |
| Location Type | Select whether this is Physical Location or Virtual Location. This will be populated in event’s SEO Schema data. |
Step 6: Creating or Choosing an Organizer
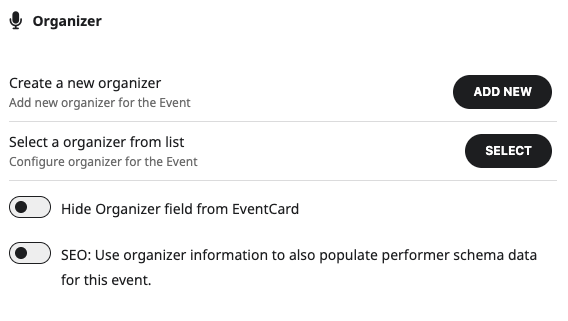
Adding a New Organizer
Add a new Organizer by clicking Add New button on the organizer section.
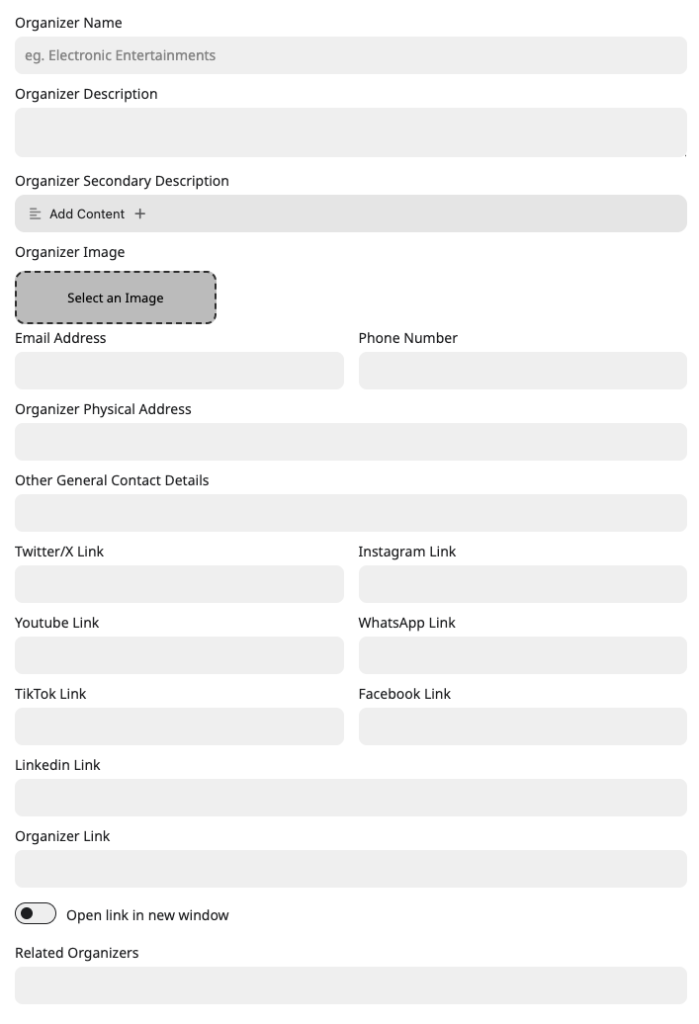
Organizer Options Explained.
| Option | Details |
| Organizer Secondary Description | Add HTML based organizer description content in here. The main organizer description may remove HTML content when saved, but this field allows HTML content. |
| Organizer Image | Add organizer image by click Select an Image. |
| Related Organizers | If you have other organizers, this allow you to choose related organizers to this organizer, which will appear in Organizer archive page or Organizer lightbox. |
Step 7: Setting User Interaction
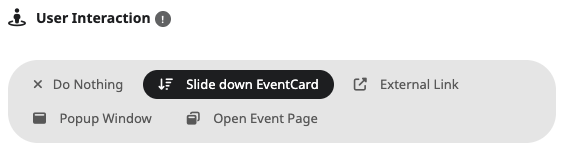
User Interaction Options Explained.
| Option | Details |
| Do nothing | Clicking on eventTop will not do any interactive actions, such as open event lightbox or open event page. |
| Slide down EventCard | Clicking on eventTop will slide down the eventCard details below. |
| External Link | Clicking on eventTop will open an external link saved in the link field. You can set this to open in same window or new window, as well. |
| Popup Window | Open lightbox of eventTop and EventCard details within the same web page. |
| Open Event Page | Clicking on eventTop will open the event page. |
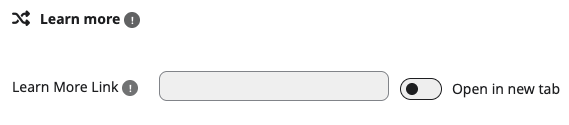
Step 8: Set Learn More Link
Enter a complete URL e.g., http://test.com — of a link you want to add as Learn More. Learn more data must also be enabled from EventCard via EventCard Designer.
Step 9: Setting Related Events
This allows you to show other related events, to the current event on event page and eventCard. Related Events data must be enabled via EventCard Designer.
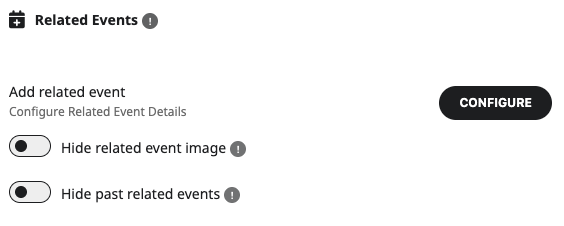
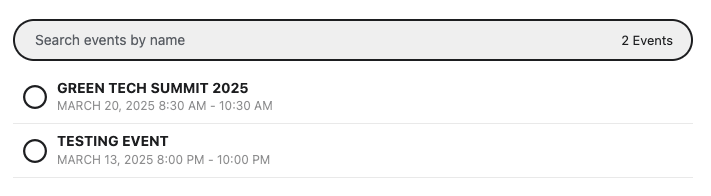
Configuring Related Events
- Configure button will open a lightbox with other events found in your website. You can search among the list by typing event names in the Search Field.
- Click on desired related event, a check mark will appear to indicate selection.
- Save Changes once complete with related event selection.
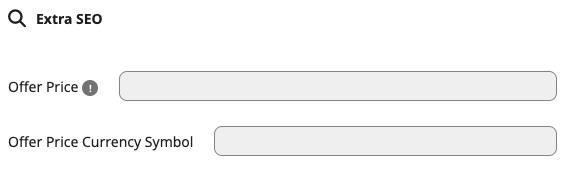
Optional Extra SEO
These are optional data that will supply relevant Schema data on the event page. Sometimes, missing this data will throw notices when validating event SEO.
Step 10: Adding Event Types (Optional)
- In Event Type and Event Type 2 fields, select or create tags (e.g., “Workshop” or “Virtual”).
These taxonomy tags enable filtering on calendars (e.g., show only “Conferences”).
- Not required, but useful for organization.
- Learn more: Using Event Types for Filtering.
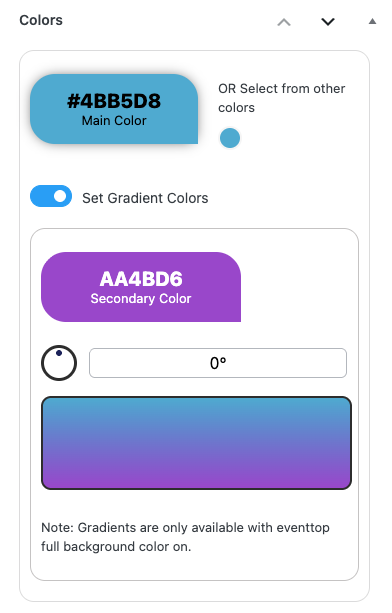
Step 11: Choosing an Event Color
- In Event Color (on the sidebar), click the color box.
- For your first event, click the top swatch to open the picker and select a hex code (e.g., #FF5733 for orange).
- Save—it’ll appear as a preset for future events.
- (Optional) Click Set Gradient Colors to create dramatic gradient color effects.
Colors tint the event on calendars and cards for visual categorization.
“Note: Saved colors auto-populate the dropdown in new events. Customize further in settings.”
Step 12: Setting a Featured Image (Optional)
- In the right sidebar, click Set Event Image.
- Upload or select an image from your media library.
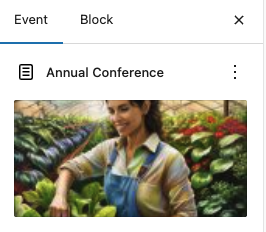
This image displays prominently on the event top & event card (If configured to .
- Recommended size: 800x600px for best quality.
- Once added to the event card layout, it shows site-wide (see Event Card Designer Guide).
Final Step: Publishing and Verifying the Event
- Review everything in the editor preview.
- In the Publish panel (top-right), click Publish (or Update if editing).

Your event is now live!
Verify on Frontend:
- Click View Event to open event page on new window, and verify details.
- Add the calendar to a page using the shortcode [add_eventon] .
- View the event: Check date accuracy, color, image, and slide-down details.
- If using lightbox or bubbles, test interactions.
Troubleshooting and Next Steps
- Event not appearing? Ensure the calendar shortcode is on a published page and clear cache. Check for date conflicts (e.g., past events hidden set in settings).
- Description issues? Gutenberg blocks may need the event card field enabled—see our Event Card Guide.
- Repeating events? Use the Repeat Event option in Time & Date section in Main Event Details for recurring setups.
Ready for more?
- Display events: Calendar Shortcodes.
- Configure Event Top: Event Top Designer.
- Customize cards: Event Card Designer.
- Add FAQs or tickets: Explore addons in our Documentations.
Did this article help you?